How to Make An Animatronic Dinosaur Riding Car
In fact, the most popular dinosaur product on the market is the 2 meters long animatronic dinosaur riding car (dinosaur kids car), with more than 3,000 units already in existence (used in China and other countries). These dinosaur-shaped vehicles are mainly used for commercial leasing (customers buy them back and operate these vehicles commercially) and various scenic spots and theme parks.
Therefore, some customers are quite interested in the dinosaur cars production. Today, we will take a 2 meters long “Tyrannosaurus Rex Kids Car” as an example to demonstrate how to make a 2 meters long (actually 2.3 meters) dinosaur riding car.
The car production video:
NOTIFICATION: Why show the 2 meters long dinosaur car production process? Because they are so common, although we have also shown the 4 meters long dinosaur vehicle production process, but the 2 meters long dinosaur vehicle is simply more popular.
QUICK FACTS:
#1. Make production drawing
#2. Weld mechanical steel structure
#3. Wrap the sponge and shape it
#4. Create skin texture
#5. Graft silicone skin
#6. Print skin color (lifelike or cartoon)
#7. Final test for finished product
1. Make production drawing

According to the customer’s requirements (the size, category and function of the dinosaurs), we will professionally make the production drawing. Usually, our designer hand-draws the forms of dinosaurs and human bodies, and also create side and sectional views of dinosaurs, marking the size ratios and functional electrical appliances, etc.
Needed tools & materials:
A pencil
An eraser
An A4 sheet of paper
A computer (unless it is a manually drawn one)
What are the key points?
- The dimensions, categories and functions must be clearly marked. This will be handed over to electricians and mechanics for customization. Mistakes should not be made at the very beginning.
- The proportions also need to be clearly marked. The mechanical workers strictly follow the proportions to shape the internal mechanical frame. Even a slight deviation can lead to significant errors.
2. Weld mechanical steel structure

After the production drawing was confirmed, our skilled mechanical workers began to weld the mechanical steel structure of dinosaur car. The entire structure is made in the form of a steel frame, and then the motors and battery are placed inside the machinery.
Key points for the mechanical steel frame:
- Be Sturdy and durable
- Can bear a weight of 100 kilograms
- When the battery is fully charged, it can operate continuously for about 2 to 3 hours
Needed tools & materials:
One welding machine
20 welding rods
2 welding pliers
20 kilograms of steel
One battery
2 motors
3. Wrap the sponge and shape it

After the mechanical structure was completed, the workers began to wrap the steel frame tightly with high-density sponge. The sculptor also used his own knife to manually carve out the dinosaur outline.
The carving master is a skilled artisan with at least 3 to 5 years of experience, who shapes dinosaur required by the customers be completed with both quality and quantity guaranteed.
Two requirements for shaping:
- With a mainly simulated appearance, it recreates the true form of the dinosaur’s head
- Mainly in cartoon form, the dinosaurs are depicted as being cute
Needed tools & materials:
A graven knife
One bucket of yellow glue
2 brushes
4. Create skin texture

After shaping the dinosaur outline, the workers then began to meticulously heat-bond the lifelike skin patterns onto the sponge. Once these patterns appeared on the dinosaurs bodies, it made seem as if these dinosaurs were truly alive.
Usually, two types of skin patterns are created:
- Like the cracks in tree bark
- Like tiny dots-like patterns
Needed tools & materials:
2 electric soldering irons
NOTIFICATION: Some cartoon-like dinosaurs have smooth bodies. Our workers have to evenly smooth out the sponge-like texture of the body one piece at a time.
5. Graft silicone skin

After the dinosaur skin textures are completed, silicone gel can be evenly applied on them for skin grafting. This approach can make the entire dinosaur body more elastic and flexible, thereby enhancing its durability.
Silicone skin work process:
- Evenly apply silicone gel on the body
- Dip the cut stockings in a layer of the applied silicone gel
- Apply two layers of silicone evenly and properly
- Dry for 5 to 8 hours
Needed tools & materials:
2 scrapers
2 pairs of scissors
20 pairs of stockings
15 tubes of silicone sealant
6. Print skin color (lifelike or cartoon)

After the silicone skin grafting is completed, our skilled coloring technicians can then start coloring the dinosaur skin by using silicone, oil paints, and gasoline.
Skin color works process:
- Mix the silica gel, gasoline and oil paints in the proper proportions
- Pour the mixed liquid into the spray gun
- According to the skin color confirmed with the customer, use the spray gun to apply the skin color in a meticulous manner
Needed tools & materials:
5 tubes of silicone sealant
3 to 5 tubes of oil paints
5 liters of gasoline
1 spray gun
1 air compressor
7. Final test for finished product
Once the skin color works are completed, the basic components of a dinosaur kids car is finished. The final step left is for our experienced electrician to test the operation of dinosaur car. The aim is to ensure that the products are free from any defects and can be put on the market. Once a problem is identified, it should be resolved immediately.
Conclusion
The above 7 processes can produce a high-quality 2 meters long Tyrannosaurus Rex kids car (dinosaur kids car). Of course, this process can transform any type of dinosaur into a riding and entertainment vehicle. Put them in the square, playground the shopping mall, and you will get the fastest return on your investment.
Related Posts
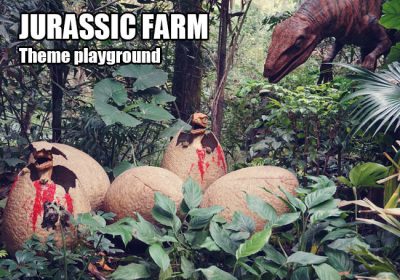
10 Outstanding Dinosaur Attractions for Jurassic Farm
The Jurassic Theme Farm which is actually a dinosaur-themed playground of a certain scale, is…
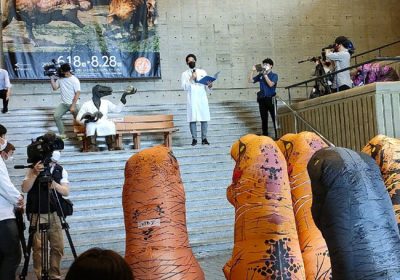
7 Things Did Make Tourists Feel Terrified & Excited at Dino Expo
Whether a dinosaur exhibition is successful, or more directly, whether it can attract more visitors…
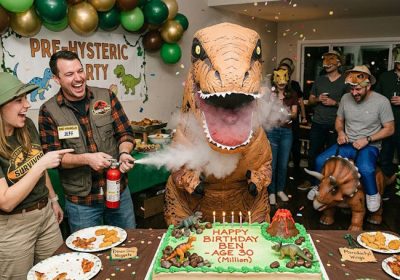
10 Best Ideas for Jurassic Theme Birthday Party
Jurassic themed parties are an enduring business. Children's childhood is fleeting, and participating in dinosaur…
Leave a Reply